How to photograph homemade food with a phone and window light
· Editorial team newsfromportland24.com
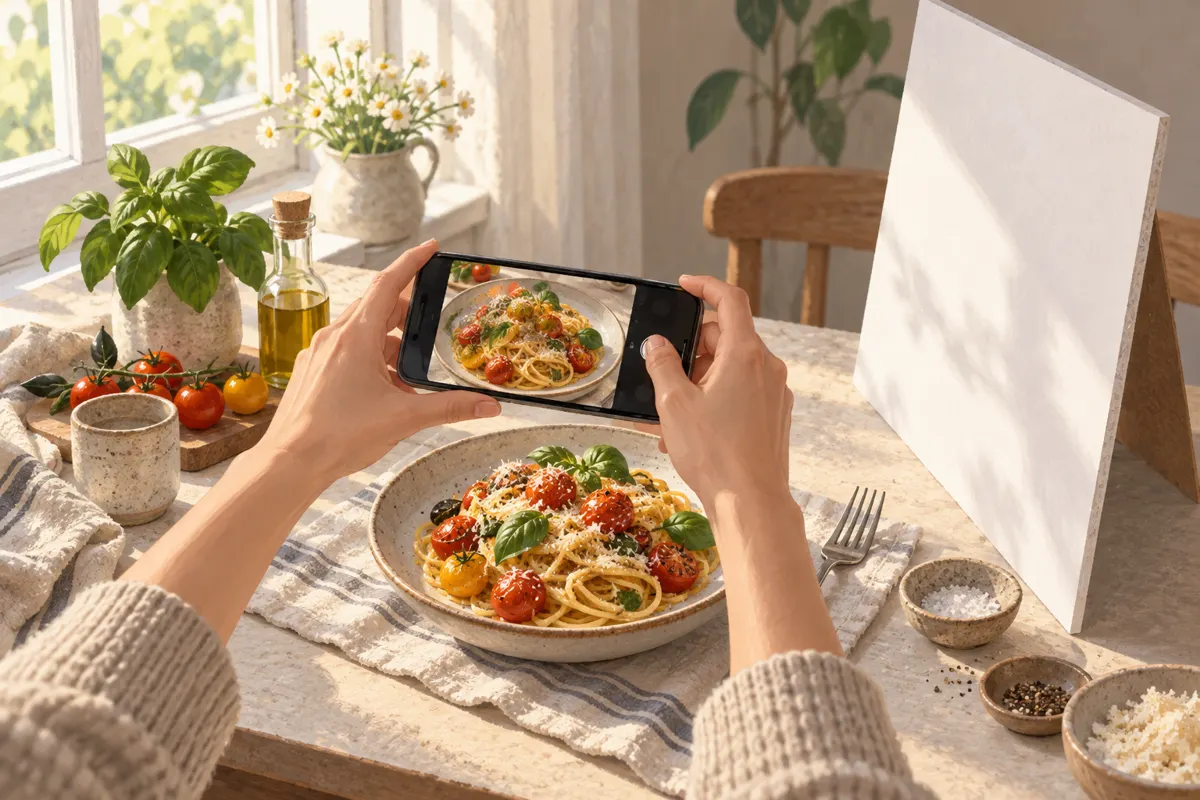
Place your food beside a window with indirect daylight, turn off the flash and tap the dish on your phone’s screen to focus. Keep the background simple, then try an overhead view, a slanted view and a side view. A few small adjustments to light and framing can make homemade food easier to photograph without a complicated setup.
Start with soft light beside a window
Look for a window that gives you bright light without a patch of direct sun falling across the plate. Set the food beside it so the light comes from one side. This gives you a useful starting point: the bright side reveals the food, while gentle shadows help show its shape and texture.
- Turn off the phone’s flash. Switch off nearby room lights if they give the food an orange or otherwise uneven color.
- If sunlight makes hard-edged shadows, adjust the blinds or filter it through a sheer white curtain.
- Move the plate and watch the screen. Choose a position where you can see detail in both the bright and shaded parts.
- If one side looks too dark, stand a piece of white posterboard opposite the window to reflect some light into the shadows.
You do not need to eliminate every shadow. Aim for enough light to show the ingredients while keeping some depth. If a white plate becomes a blank bright patch, adjust its position or reduce the camera’s exposure before taking more pictures.
Give the dish a clean, simple setting
Use a background that lets the food stand out: a plain tabletop, a wooden cutting board or a neutral cloth. Check the whole frame, including its edges. A distracting package or unrelated utensil can pull attention away from the meal even when the plate itself looks good.
Keep styling modest. Arrange the food so its main ingredients are visible, and check the plate rim for unwanted smears. If the dish includes herbs, nuts or a sauce, a small finishing touch can help communicate what is in it. Use additions that belong with the meal.
For a simple proposed arrangement, start with just the dish, then add one folded napkin or a fork if the frame feels empty. Take another photo and compare. Keep the extra item only if it helps the composition rather than competing with the food.
Set focus and brightness before shooting
Start with your phone’s regular camera mode. Tap the part of the food you want to look sharp, such as the front edge of a pastry or the visible ingredients in a bowl. Check that the camera has focused on the dish rather than a prop behind it.
- Adjust brightness with the exposure control if your camera offers one. Reduce it slightly when pale food or a white plate loses visible detail.
- Enable the camera grid to help align the tabletop and balance the plate within the frame.
- Move the phone closer or farther away to change the framing before using digital zoom.
- Hold the phone steady. If you already have a phone tripod, use it when keeping the same composition for several shots.
Controls vary between phones, so concentrate on the result visible on screen. You need clear detail in the food and brightness that preserves its texture; manual settings or an additional camera app are optional.
Choose an angle that shows the food
The most useful angle depends on the dish. Take a few views instead of assuming that every meal looks best from above. Watch what each position reveals and what it hides.
- Overhead: try this for pizza, salads, bowls or several dishes arranged together. Keep the phone parallel to the tabletop.
- Around 45 degrees: use this as a starting point when you want to show both the surface of the food and the shape of its bowl or plate.
- Near plate level: try this for pancakes, burgers and other foods whose height or layers are part of their appeal.
Leave a little space around the dish so you can refine the crop later. For an overhead photo, use a surface you can comfortably reach while keeping the phone level.
Make small edits and keep the food believable
Choose the photo with the clearest food detail and strongest composition. Crop distracting edges, straighten the frame and make small brightness adjustments. If the image looks too orange or blue, adjust its warmth or white balance until the food looks closer to how it appeared beside the window.
Keep color and shadow changes restrained. Strong edits can obscure texture or make ingredients look unfamiliar. Before saving, check the main ingredient, the plate’s brightest area and the background. If those look clear and natural, the photograph has done its job.